How to Make Fake Spider Webs

Nothing sets a spooky scene like spider webs. Decorating your house or event venue in spider webs creates a neglected, creepy atmosphere that is perfect for Halloween parties and get-togethers. Here are some tips for how to create the perfect fake spider webs.
- How to Get the Neighbors to Jump on the Halloween Bo...
If you live in a neighborhood that's already embraced the Halloween Boo, count yourself lucky. It's so fun to kick off the fall holiday season with festive treats and messages on all your neighbor's doors.... - Halloween Boo Poems and Signs
If you've decided to start the Halloween Boo in your neighborhood, you'll need some supplies. This article has links to signs and downloadable poems, as well as full poems to cut and paste. ...
1. Gather spider webbing
Spider webbing is available at any Halloween or party store in the fall. Often grocery stores and convenience stores will sell webbing as well. When you go to pick up your webbing, know ahead of time how much wall space or countertop space you will need to cover so that you can be sure you have enough. The spider webbing will come rolled into several large clumps.
2. Choose an adhesive to attach webbing to surfaces
Next, you will need to choose an adhesive to stick your webbing to walls, tables, doors, or whatever surface you will be covering. What adhesive you will use will just depend upon the surface. Scotch tape works well because it is transparent, but be careful about sticking any tape to painted surfaces, as the paint may come off when you remove it. Sometimes, you can simply attach the webbing to structures such as picture frames or door handles without having to use adhesive at all. No matter what method you choose, attach one end of the webbing to one portion of the area you wish to cover, and then stretch the webbing out in a straight line to an opposing point in the area.
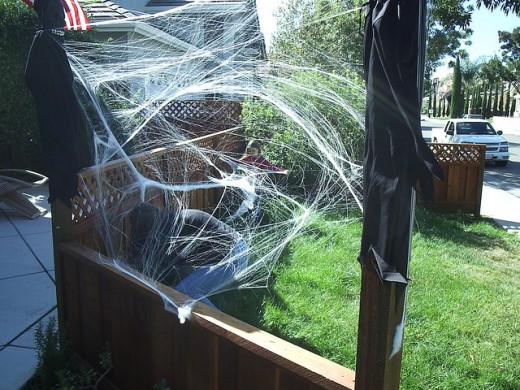
3. Stretch the webbing
Once you have attached your webbing at two opposing points, break apart the webbing with your hands and spread it in the opposite direction. So for instance, if you have attached the webbing to the right and left sides of a wall, pull apart the webbing in the middle and stretch it toward the top and bottom of the wall. String the webbing out as thin as you can for a more realistic effect. Remember that if your webbing hangs loose or comes apart in places, that is no problem—real spider webs look like that too!
Of course, if you are wrapping the webbing around objects—chairs or table legs, for instance—you will want to simply wrap the webbing instead of stretching it out as with a wall. However, be sure to use only a little webbing to do this so that your webbing doesn’t simply look like cotton clumps. It is a good idea to start with a very small bit of webbing and keep adding until it looks like you want.


")


